
Network access to Home Assistant directories using the network share makes it possible for you to efficiently control configuration files, among others, using your PC or Mac without resorting to web-based editors. Herein, you will learn how to configure the Samba Share add-on, how to secure it, how to access it using different operating systems, and how to edit safely.
Why access files over a network share?
Network share enables you to control the Home Assistant folder on another computer on your LAN. This will make it easier to edit the files without having to do it in a browser tab. If available, the Samba Share add-on provides selected folders via SMB protocol.
Prerequisites and important limits
Confirm your installation type
Since you have Home Assistant OS installed, the instructions will work seamlessly since add-ons are included in this kind of installation method.
Add-ons are only accessible through some installations (supervised/OS installations specifically).
In the case of OS installation, the add-ons are controlled by Home Assistant Supervisor.
Know your LAN details
You will require the Home Assistant host name or IP (Settings -> System -> Network).
Keep SMB access to LAN only.
Install Samba share
Step 1: Get the add-on
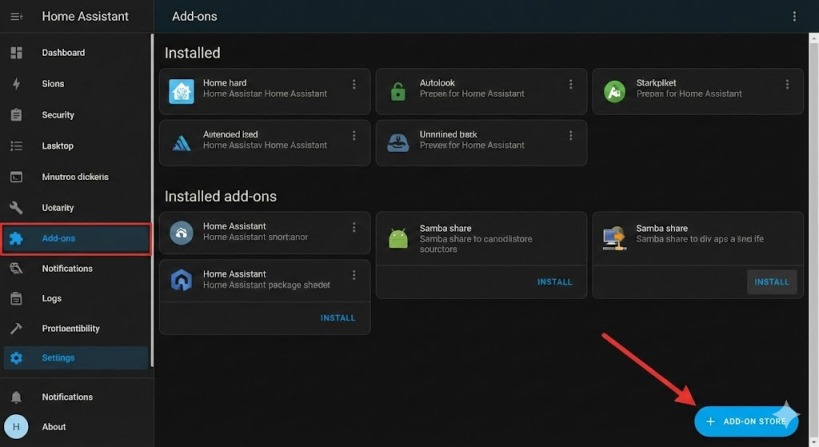
- Settings > Add-ons
- Open the Home Assistant Add-on Store, type “Samba share” in the search bar, and install it.
- Open the add-on and navigate to the Configuration tab.
Configure the share securely
Step 2: Set credentials and choose shares
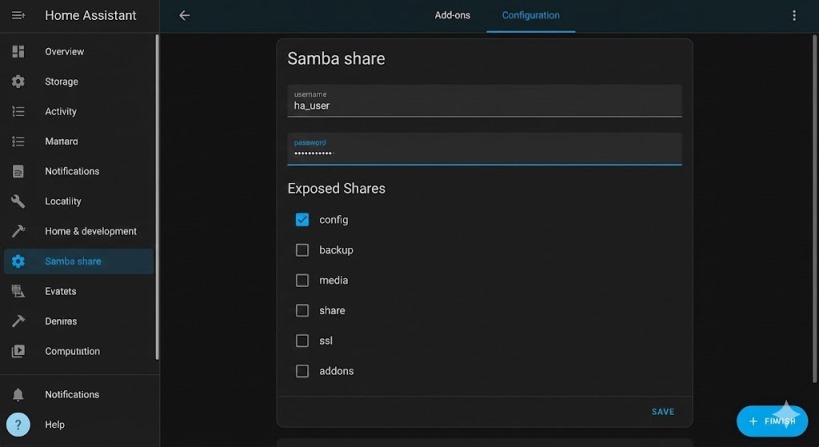
Choose your username and password (this is not the same as your Home Assistant account).
Next, look at which directories you want to make available. The documentation provides the most common directories, which include config, backup, media, share, ssl, addons, and addon_configs.
It is a good idea to begin with config and to expand on other directories only when you need to.
Step 3: Limit Access
- Restrict access by allowing only IP ranges through allowed_hosts (do not allow any external subnets here).
- Remove unnecessary options from enabled_shares (you can always activate them in the future).
- Think about activating veto_files to prevent creation of unnecessary files by client operating systems.
Security tip: compatibility_mode allows usage of old protocols, but it is more insecure than other protocol versions.
In case you need additional security, the add-on also tells about the server_signing setting; do not change it unless you know the implications of changing it.
For unreliable Windows network browsing, set workgroup to match your computers and think about activation of local_master.
After that, save configuration and start the add-on using its Info tab.
Also Read: How 6GHz Wi-Fi Solves Common Home Network Problems
Connect from Windows
Step 4: Browse and pin a folder
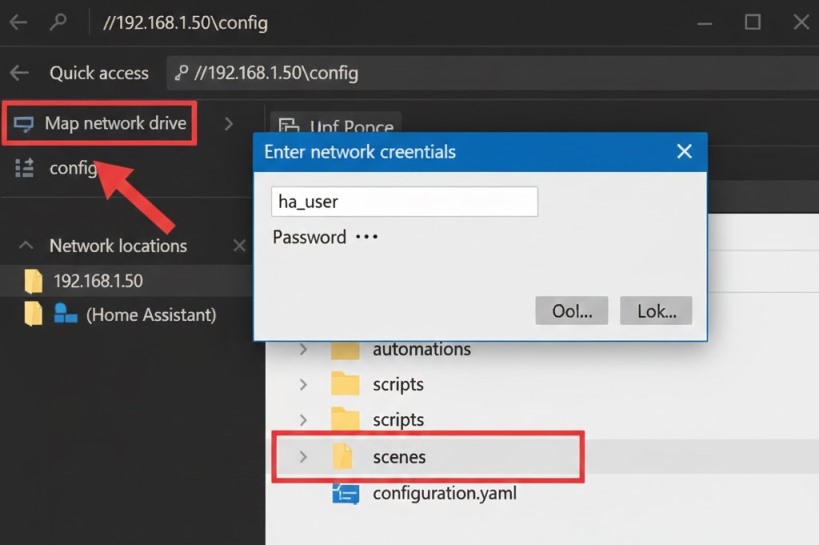
- Launch Windows File Explorer.
- Type the share path in the address bar, with the IP (for instance, \192.168.1.50), and log in using your Samba username and password.
- For future convenience, map the network drive to a particular folder (such as \192.168.1.50\config).
Connect from macOS and Linux
Step 5: Use SMB URLs
- For MacOS Finder, click on “Go” and then click “Connect to server” and type smb://hostname (or IP-based SMB URL).
- For many Linux distributions, go to “Connect to Server” in your file manager and type the SMB URL.
Edit safely and apply changes
Step 6: Make small, testable edits
Your main YAML configuration file is configuration.yaml, typically inside the config share.
After editing, run the configuration validation of Home Assistant (where available), then either reload or restart.
Common-sense safety suggestions:
- Do not edit hidden system directories (such as .storage) unless you really know what you’re doing.
- Back up first before making any major edits and especially before removing files.
- One change at a time, reload/restart and check.
Troubleshooting checklist
- Discovery will not work: connect via IP rather than through the “Network” option for browsing.
- Incorrect credentials: Samba employs the add-on username/password combo, not your Home Assistant login.
- Missing share: ensure that it exists in enabled_shares.
- Some devices are unable to connect: make sure that they fall into your authorized IP range.
Conclusion
For accessing Home Assistant files through a network share, it is best to do so in a secure and calculated manner. With the use of Samba Share addon, securing access by restricting access to specific folders and permitted hosts makes it easy to access your files from the desktop without putting yourself at risk.
FAQs
Q: With which folders do I start sharing first?
Answer: First share config; media and backup when necessary only.
Q: Is this available for Home Assistant Container?
Answer: Add-ons are unavailable there, so you will use the shared configuration folder on your host OS.
Q: Why can I connect via IP but not via name?
Answer: Name discovery may be inconsistent for networks and clients, so IP connection is more reliable.
Q: Am I forced to restart every time?
Answer: No, sometimes you can just reload a service and restart in other cases.
Q: What is the safe way of working daily?
Answer: Backup, make one change, check it, and see that everything works fine.
