

DNS resolver provided by your ISP is very important for your home network; however, this is usually the weakest part. Resolvers provided by ISPs may be slow, error-prone, and may not provide necessary privacy protection. Here is the process that you need to follow to configure the DNS settings on your router in order to get rid of these limitations. Then, it describes some of the public DNS service providers which can provide better surfing experience. “In this guide, we will explain exactly how to change dns on router settings to bypass these limitations, and help you choose the best public DNS provider for a faster, more secure browsing experience.”
- Reasons for Switching to a Non-Default DNS Setting Offered by Your ISP
- DNS Menu Location on the Router
- Step-by-step Guide for Changing DNS on Router Without Damaging the Network
- Practical Examples That Make the Change Worth It
- Common Mistakes When You Update DNS
- What to Expect After the Switch
- Conclusion
- Frequently Asked Questions
Reasons for Switching to a Non-Default DNS Setting Offered by Your ISP
Most of the time, routers use DNS servers that have been set up automatically by the Internet Service Provider. This may work well, but it is not always the best way to go about it. When people look into ways of changing DNS settings on their routers, they usually try to achieve one of the following:
- Improvement of Name Resolution
- Privacy and Control of Router Actions
The publicly available DNS servers used by end users in 2026 include Cloudflare (1.1.1.1/1.0.0.1), Google Public DNS (8.8.8.8/8.8.4.4) and Quad9 (9.9.9.9/149.112.112.112). While Quad9 specializes in privacy and security, Cloudflare gives information about router settings.
DNS Menu Location on the Router
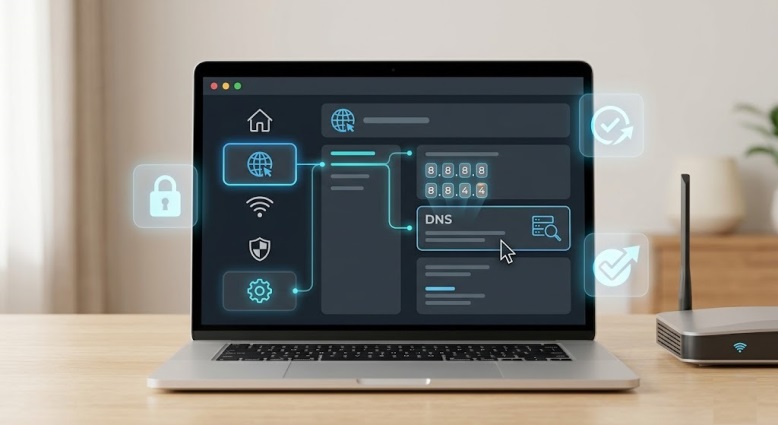
One of the main difficulties of changing router’s DNS settings is not the DNS server addresses itself but the place to enter the information in the device’s menu. In most cases, the necessary part is located under one of the following menus:
- Internet
- WAN
- Network
- Advanced setup
- LAN DHCP DNS (or similar)
Standard router setup guides usually begin with the login to the router through its local IP (192.168.1.1 or 192.168.0.1) and enter the needed DNS addresses in the router’s DNS box.
By experience in networking forums, users usually recommend to enter the public DNS addresses in the WAN/internet menu as this menu defines how router will resolve traffic. In case, some routers have an option of LAN or DNS filter if it is required to force the router’s DNS addresses on devices which connect to it.
Step-by-step Guide for Changing DNS on Router Without Damaging the Network
For defining and performing the right and ordered change of the DNS setting on a router, the following steps are recommended:
1) Logging into router’s admin interface
Open your web browser and go to the router’s IP address, like 192.168.1.1 or 192.168.0.1. Log into router using your admin login and password.
2) Locating DNS settings menu
Go to such sections as Internet, WAN or Network where DNS settings are usually located.
3) Disabling automatic DNS provision if it is required
Some routers acquire DNS information automatically from the ISP. You will have to disable this function to change the DNS addresses manually.
4) Define the DNS servers to be used
- Here are the examples of popular DNS servers:
- Cloudflare: 1.1.1.1 and 1.0.0.1
- Google: 8.8.8.8 and 8.8.4.4
- Quad9: 9.9.9.9 and 149.112.112.112
5) Save settings and restart the router if needed
While many routers apply the changes right away, sometimes the changes require a restart.
6) Verify the settings in different devices
This is the crucial step. The best solution to the problem of how to change DNS in a router is not only setting up the settings but also making sure that devices use the designated DNS servers.
This procedure will also help to easily understand how to set up DNS settings in router menu without using special networking jargon.
Practical Examples That Make the Change Worth It
A family using various devices for streaming will like Cloudflare since the setup process is very easy, being performed at the router level, and allows updating of all devices at once. This is the reason why questions about how to set up DNS on a router are much more popular than changing the settings on particular devices.
For a person who uses his home office for working, Quad9 can be preferable since it emphasizes the necessity to block malicious websites. Thus, the setup of DNS becomes the issue of security rather than performance, which is especially relevant for the home network environment.
Another real-life example is the discussion among networking enthusiasts about how to change DNS on a router. In these discussions, the most frequent advantage mentioned is increased reliability rather than fast loading; pages load more consistently, and devices do not use only ISP default servers anymore. From the forum discussions, it is possible to see that sometimes people try to use primary and secondary DNS together, but not many people use it.
Also Read: How to Access Your Home Assistant files via Network Share
Common Mistakes When You Update DNS
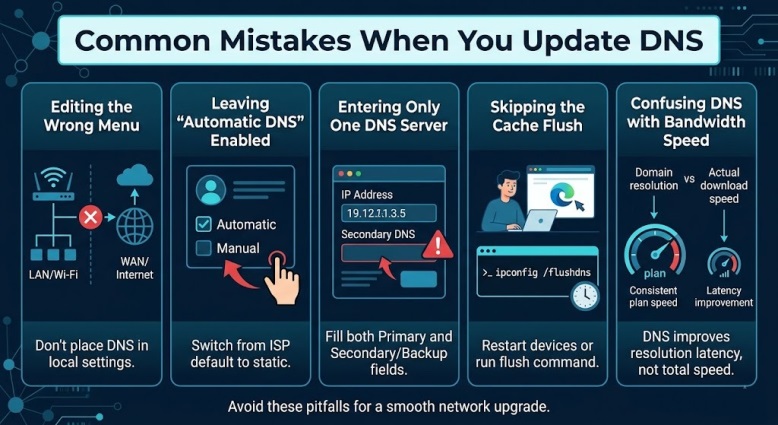
If there is an inquiry about how to change the DNS settings in a router, the actual issue is often related to one of the following mistakes:
- Configuring the DNS settings in the wrong menu
- Not disabling the automatic DNS from the internet service provider
- Using just one DNS server rather than two servers
- Changing the DNS settings in the router without restarting the other connected devices
- Thinking that the change in the DNS settings will solve all issues with broadband speed
That is why changing the DNS on the router is a small optimization for the network and not a solution for all problems.
What to Expect After the Switch
In case the DNS service of the ISP was not working well or was unreliable, then the change will immediately become noticeable. In case the previous DNS service worked well enough, the difference will be not so noticeable. During many practical discussions among users about the way to change DNS on their routers, the mentioned benefits are smooth browsing, fewer random interruptions during lookups, and easier management from the networking point of view, rather than faster downloads.
This explains why people search for ways to change DNS on their router and set DNS on their router.
Conclusion
Learning how to configure DNS settings on a router is a process that is not only achievable but also useful. It allows gaining better control over privacy, stability, and network behavior without the necessity of any extra equipment. Whether your primary goal is faster lookups, stronger privacy, or automatic malware filtering, the main takeaway is simple: make a backup of the current configuration, choose a reliable DNS service provider, analyze the differences, and use the one that works best for your home network. A proper DNS configuration on the router will not turn slow internet connection into fast internet connection; nonetheless, it will make your daily surfing easier, faster, and more stable.
Frequently Asked Questions
Is it safe to change the DNS settings of my router by myself?
Yes. It is okay as long as the previous values are saved before making any changes. In case of any mistakes, the previous DNS settings can be restored within minutes.
What happens if my router’s interface is not like the instructions found online?
Go to the sections called WAN, Internet, or DHCP settings. Although the terminology differs depending on the brand, the necessary DNS setting will be found there.
Can I try a new DNS without making any permanent changes to my network?
Make temporary changes for one or two days and roll back in case of necessity. This way you get the easiest opportunity to evaluate the safety and efficiency of changing DNS on your router.
What DNS provider should be preferred as the first choice?
Some of the most widely mentioned public DNS providers in 2026 are Cloudflare, Google Public DNS, and Quad9.
