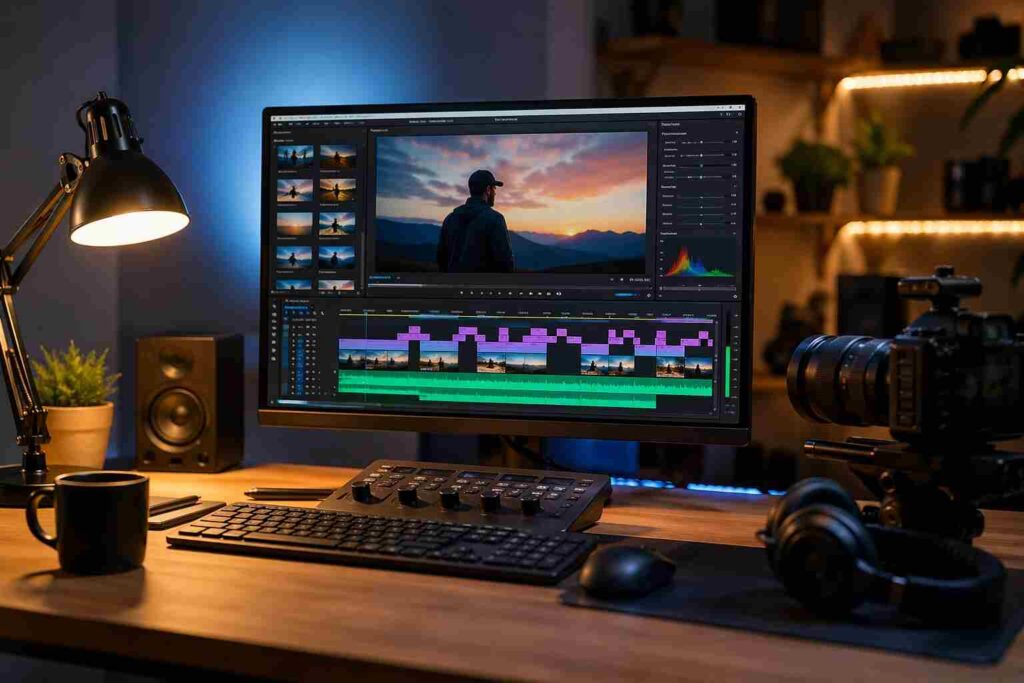
Good video editing is not about being flashy. It is all about ensuring making each second of watching easier, easier to follow and harder to miss. The correct edits, audio cleanliness, intentional B-roll and platform conscious formatting can boost retention, build trust, and achieve outcomes in a short period of time. These video editing tips will help you produce sharper videos that keep viewers engaged longer, consistently, today.
- Why most video editing tips fail beginners
- Start before the timeline: plan the edit while recording
- Organize your footage before you cut anything
- Build a rough cut that tells one clear story
- Improve pacing without making the video feel rushed
- Use B-roll, text, and transitions with restraint
- Fix the two things that make videos feel amateur
- Edit for the platform, not just the footage
- Export settings that preserve quality
- Final editing checklist
- FAQs
Why most video editing tips fail beginners
Majority of guidance on the internet is too general to help. Add transitions, or make it cinematic, is no aid to the decision of what to cut, what to retain, why a particular version is more engaging to watch than another.
Good editing begins with a single question: how does the viewer feel, know, or do after this scene? All cuts must favour that result.
That is why professional editors do not begin with effects. They begin with story order, shot quality, and sound clarity.
Start before the timeline: plan the edit while recording
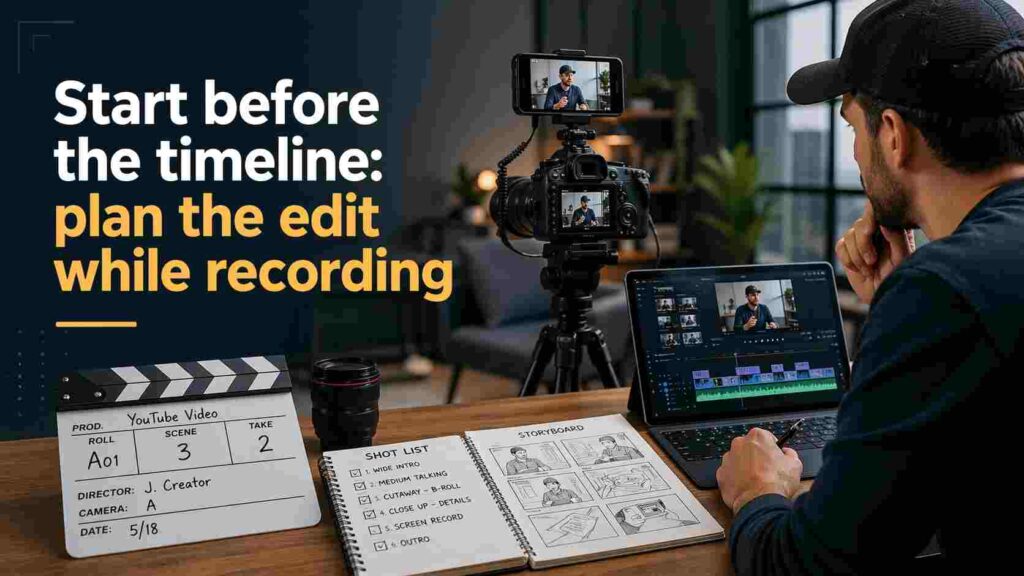
The easiest way to improve an edit is to create less chaos during the shoot. Record with the timeline in mind.
When shooting a talking-head video, leave minor pauses between shots. That provides you with clean cut points. When shooting a property tour, remember to have wide shots, detail shots and movement shots as the editor will have alternatives rather than use the same angle.
A basic shot list helps:
- main speaking shot
- supporting B-roll
- close-ups for detail
- one extra take for safety
This matters because bad footage creates forced editing. Good footage gives you control.
Organize your footage before you cut anything
A messy project slows every decision. Before editing, sort clips into folders or bins such as A-roll, B-roll, audio, graphics, and music.
Rename important clips clearly. “Interview take 2 clean audio” is useful. “Clip_0049” is not.
If the footage is high resolution and your computer struggles, use proxy files. Proxies are lighter versions of your clips that edit faster while preserving the original quality for export.
Basic editing workflow:
1. Import footage
2. Rename key clips
3. Sort A-roll and B-roll
4. Mark best takes
5. Build rough cut
6. Clean audio
7. Add B-roll and text
8. Color correct
9. Export for platform
This workflow removes friction. Friction kills consistency.
Build a rough cut that tells one clear story
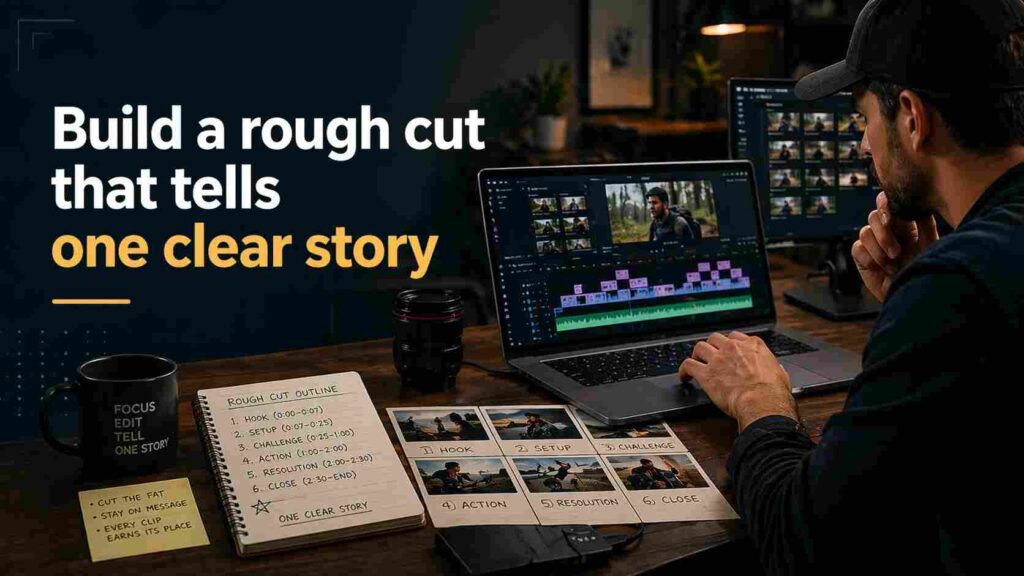
Your first edit should be functional, not pretty. Build a rough cut by placing the strongest clips in logical order.
Do not worry about transitions yet. Focus on whether the message is clear from start to finish.
For example, if you are editing a tutorial, remove repeated explanations. If you are editing a real estate walkthrough, do not show the same room twice unless the second shot adds something new.
A strong rough cut usually does three things:
- gets to the point early
- removes weak takes
- keeps one idea moving at a time
If a clip is visually good but slows the message, cut it.
Improve pacing without making the video feel rushed
Pacing is one of the biggest differences between amateur and professional editing. Slow videos lose attention. Overcut videos feel nervous and cheap.
The fix is not to cut everything aggressively. The fix is to cut delays, repetition, and empty space.
Look for:
- long intros before the main point
- pauses that add no emotion
- repeated words or similar shots
- segments that explain what the viewer already understood
A practical test helps. Watch the edit once with the sound off. If the structure still feels clear and active, the pacing is usually solid.
Use B-roll, text, and transitions with restraint
B-roll should explain, support, or hide a cut. It should not exist just to decorate the timeline.
If someone says, “The kitchen has custom lighting,” show the lighting. If a speaker stumbles between lines, use B-roll to cover the jump cut. That is purposeful editing.
Text overlays should do the same. Use text to reinforce key numbers, steps, or offers. Do not repeat every spoken sentence on screen.
Transitions are where many videos go wrong. Simple cuts and basic dissolves usually outperform effects-heavy edits because they keep focus on the content.
Fix the two things that make videos feel amateur
Poor audio ruins more videos than imperfect visuals. Viewers will tolerate average lighting, but they leave when sound is harsh, uneven, or hard to understand.
Start by leveling volume between clips. Remove background noise where possible. If music competes with speech, lower it.
Then handle visuals. Color correction comes before style. Adjust exposure, white balance, and contrast so shots look consistent. Only after that should you think about a creative grade.
Here is a simple comparison:
| Editing Element | Weak Approach | Strong Approach |
|---|---|---|
| Audio | Different volume in every clip | Even, clean, easy to follow |
| Pacing | Long pauses, repeated ideas | Tight structure, clear progression |
| B-roll | Random filler shots | Supports the spoken message |
| Transitions | Frequent flashy effects | Simple cuts that keep focus |
| Color | Mixed tones and brightness | Balanced, consistent visuals |
Edit for the platform, not just the footage
A good edit on YouTube is not always a good edit on TikTok or Shorts. The viewing environment changes the editing strategy.
For YouTube long-form, viewers will accept a little breathing room if the content is useful. For Shorts, Reels, and TikTok, you need a faster opening, tighter framing, larger captions, and earlier payoff.
This is where many competitors miss the mark. Editing decisions should be shaped by:
- screen size
- sound on or off
- vertical or horizontal format
- viewer attention span on that platform
That means platform-first editing is not optional. It is a performance factor.
Export settings that preserve quality
A polished edit can still fail at export. Wrong settings can soften the image, create audio issues, or crop the frame poorly.
Keep the export aligned with the original project settings unless the platform requires otherwise. Match resolution, frame rate, and aspect ratio correctly.
Before publishing, check:
- captions are readable on mobile
- audio peaks are controlled
- no graphics are cut off
- file size is reasonable without visible quality loss
A clean export protects the work you already did.
Also Read: Modern Video Editing Workflows for Creators and Marketers
Final editing checklist
Before you publish, ask five direct questions:
- Does the video reach the point quickly?
- Is the audio clean and balanced?
- Does every clip add value?
- Is the pacing tight without feeling rushed?
- Is the format right for the platform?
That checklist catches most quality problems before the audience does.
There is nothing secret about good editing. It is a repeatable system that is founded on solid footage, rigorous cuts, definite sound and platform conscious decisions. Use it regularly and your videos will be more refined, professional, and engage better. To continue enhancing your process, geekmainframe.com could be a handy point of helpful advice, workflow concepts, and content-centered video editing information.
FAQs
1. What is the most important video editing tip for beginners?
Start with audio and structure. If the message is clear and the sound is clean, the video already feels more professional.
2. How do I make my edits more engaging?
Cut slow sections, open with the main point earlier, and use B-roll only where it adds clarity.
3. Should I use lots of transitions?
No. Most videos perform better with simple cuts and occasional dissolves than with constant visual effects.
4. What is B-roll in video editing?
B-roll is supporting footage used to add context, improve pacing, or hide cuts in the main footage.
5. Why does my video still look weak after editing?
Usually because of uneven audio, poor pacing, inconsistent color, or a format that does not match the target platform.